AutoCAD and My Personal OCD in It (Good autoCAD Practice)

Wow, it has been a long time since my last post. So much for the promises that I made in the last post.

Anyway, I really don’t wanna kill this blog, so, rather than aiming of doing something big that turned out I couldn’t commit to (like all those projects that I said in my last post), I decided just to start small and starta writing in this ‘serious’ blog again.

So, for this post, I am going to talk about the very software that I am sure everyone knows of: autoCAD. Yup, working in design department for hydroturbine products forced me to get dirty with this software. I learned it when I was in college but it is not until this past two years that I finally dwelved deeply into the software. Don’t get me wrong, I wont talk about the software itself. I am very much sure that the software itself is effing good (Hell, everyone uses it). What I want to talk about is the good practice of using the software to draw stuff, pretty much like the post about MATLAB good coding practice that I created few years back, cause apparently, I have an acute case of OCD to deal with.

This thought actually came after several month working in my current workplace. While most of my colleague do well (and by well, I mean really really well, as in way better than me) in terms of designing the product, I am afraid they are not doing things well/efficiently/effectively with their autoCAD (or at least that’s what I thought). While this has no impact on the design, works gets really frustrating when you have to edit/correct/modify the drawing because the drawing was not made properly and it really frustrates me (and also tickles my OCD sense); because that what I did when I just started working. So, to avoid future generations making bad autoCAD drawing, I am gonna write a few guidelines that can make you more efficient, and not to mention: more badass with your autoCAD.

1. Be a keyboard commando.

Keyboard Commando

I think most user of autoCAD knows that we can perform action in autoCAD from the toolbars or by typing the command directly from the keyboard. While each person is entitled to their preferences, I personally prefer typing the command directly or what is usually called Keyboard Commando. While you must memorize the command for each action (which I am sure you will memorize it in no time), I find it really helpful to keep my cursor inside the drawing at all the time instead on moving it outside to click on the toolbar and then moving it back again inside the drawing. It is like playing FPS, one hand on keyboard and one hand on mouse. Being a keyboard commando also makes you versatile because you don’t really rely on the GUI (you know, since autoCAD GUI layouts can be changed by anyone and even by autodesk itself when the newer version is released). When I first came to Japan, I had to draw all those drawing in the japanese version of autoCAD and honestly, I am glad I am a keyboard commando, because I dont need to bother to look at those small kanji letter in the toolbar to do what I want. Not to mention saving me the trouble of opening dictionary.

2. Use block and create a good block structure.

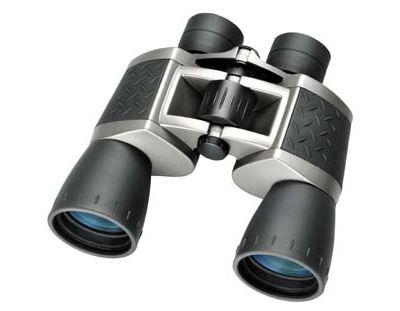
autoCAD Blocks

This one is kinda hard to explain. Basically, when you are creating several identical objects in your drawing, the clean/right/elegant way to do it is by drawing it and define it as a block and then copy it to the place that you want. Yup, this way, this object are ‘linked’ to a definition, so that we you want to edit it, just edit the block definition and viola, all those object updates itself. This saves you the trouble of finding all those parts one by one and edit them manually. Not to mention that apparently, by using block to define several objects leads to smaller CAD file size and apparently makes autoCAD run faster than if it is not defined as a block. But again, for the latter, I might be wrong because I didn’t exactly measure it. Just my plain feeling.

Aside from that, even though you are going to have one object in just one place, sometimes it is also a good idea to make it a block. Why? Because sometimes drawing gets so complicated that every object comes on top on the other and it become really hard to distinguish whether a line belong to which objects. By making it a block will also makes your life easier when you want to select that particular object, for example to be moved or copied or even deleted. Yep, saves you the trouble of selecting each line one by one.

One thing that I need to mention though is that when you define a block, make sure to define the origin point. What is that? It is a place to show you the control point of your block. With this control point, you can easily move the block by clicking on those points, so yeah, no need to waste your energy typing ‘M’ just to move the block. This control point will also be the axis of your rotation if you decided that you want to change the orientation of the block via the properties panel. See, one more reason to use block. By default, the origin is always set to 0,0 every time you are about to complete defining a block, so, be sure to adjust it properly with your block definition.

One more thing about block is that you can use it to create repeated pattern. Yup, in my field of work, most of the parts that I draw are in circular shape that has a repeated pattern every certain width of angle. So, I really like to use block-array combo to get the jobs done. That way, I can easily make the repeated pattern and change it only ONCE should I need to edit it.

Note that block can also be used for a frequently used component of drawing, like symbol or bolts or nuts, and can be really powerful when it is used as a template or . Yep, imagine typing bolt-enter-m12-enter and, bam, M12 bolt pops up in your face.

3. Beware of the double-edged OSNAP.

Double Edged

I am sure every autoCAD users use object snap. Hell, there is no reason not to use it. This is one of autoCAD’s feature thay makes our life easier and one of autoCAD feature that amaze the shit out of me when I used autoCAD for the very first time. Wanna start new line from the end of the previous one? just move your mouse near the end point and, jajang (Author Note: Jajang is the Korean version of Viola), autoCAD will snap it for you. Sadly, while this feature is like an oasis in the middle of CAD dessert, this feature is also double-edge.
As drawing gets more complex, it is going to be hard for autoCAD to object-snap the cursor to the location that we intended and we will also have a hard time telling if that object snap is the one that we want, simply because those possible object snaps are really close to each other (but doesn’t point to the same location). The worst part is that you wont even notice that you are clicking the wrong points when you are about to do something that involves connectivity like hatching or dimensioning. The only way that you can avoid this from happening is by being careful and limitting your object snap setting instead of turning them all on and beware of the object snap symbol that autoCAD shows you when it object-snapped your cursor. Square means edge point, triangle means middle point, and so on.

4. Do not stretch.

Do Not Stretch

It is really convinient something to just drag the edge of the line to trim it or extend it to another line or objects. However, I find it the hard way that sometimes doing this will cause connectivity problem even though those line does perfectly connected when you do it right. Not to mention that doing so may shift your line’s orientation (which you usually want to keep) or risk clicking on the wrong point because of the object snap problem that I’ve explained in point 3. That being said, I personally think that it is best to stick with trim and extend command to trim or extend line. Note that you can easily switch between trim or extend by using shift key.

5. Use viewport with style.

Viewport with Style

Okay, I have to be honest with you. I didn’t really know about viewport until I was working here. Why? Because in college, most drawing that I made is not to be printed. However, here, in Japan, I have to print the drawing every day and submit it for my boss to be checked or used as a reason to scold me (T T). Yeah, so basically, the concept is to draw all your drawing in model tab with the real scale, and yeah, by real scale I mean knock yourself out and use 1:1 scale. Then, to print the drawing, create a viewport in the paper space tab and scale it accordingly to fit the paper. This way, you can use the dimension easily while keeping your drawing scaled for the printing. And the epic part about the viewport is: you can adjust which layer’s visibility exclusive for that one viewport only. This is really useful when you have one big picture to show the general outline of the object that you are drawing and one smaller picture to show the detailed outline of a certain parts. To do this, people usually just makes  two copies of the object, each with different dimensioning and then use two different viewports to put it in the paper space. While this is perfectly fine on the print, this is not the elegant way. The correct one, is just to use one object and put the dimensioning for the general outline and the detailed outline there on the very same object, but in different layer, then, use two different viewports to show both the general outline and the detailed parts, and hide the unnecessary layer to hide the unwanted dimensioning in each viewport. Elegant and full satisfaction to your OCD sense.

***

Fiuh, well, I think that is all that I am going to write today. It is currently 2AM and I really need my beauty sleep. A little disclaimer though, I am not associated with autoCAD in anyway and this post is not intended to say that I am effing expert at autoCAD. I am still a noobs and in fact I still learn something new everyday about autoCAD. This post is just a shout-out of my OCD heart to all those people out there, so that they can use autoCAD in the right way so that it does not trouble me when I have to revise their drawing. I hope you find this post useful, or entertaining. Ciao…

Regards,

0X_R

Posted in Uncategorized | Tagged , | Leave a comment

The Future of This Blog and New Project Listing

Okay, this is bad. It has been officially more than a year since my last post and I also haven’t made any new addition to my toolbox or library or whatsoever within this year and last year. While I do have a lot of valid reason to excuse me from contributing to this blog (work, coursera, and other stuff), excuse is still an excuse. Somehow, I feel that I have to make a good comeback or I’ll end up neglecting this blog FOREVER. Desperate condition calls for desperate action.

So, I decided to make my comeback from now on. However, unlike the previous posts where I mostly explain or promote the newest addition to my MATLAB Fun Toolbox or other resources, I decided to make it as simple as project report. It will be pretty much like my thesis progress report that I wrote regularly in the past. But, instead of writing about my thesis (that god it is over), I’m going to write about my personal projects. I have some personal project in mind that I just kept in my mind and haven’t done anything about it. So, hopefully, this will make my blog alive again and get my motivation up again in blogging (and showing my skills off).

So, here it is, my personal project that I have in mind that I am going to do from now on (Hopefully).

  1. MATLAB Standardization Projects. Yup, I am always known for my highly acute OCD. And in relation with my MATLAB coding, I always try to keep my coding style consistent between one and another. Unfortunately, as the time goes and my skill develops, I find it that some of my coding style is inefficient or ineffective and has to be changed. That leads to an inconsistency between codes that I made. And, since MATLAB itself didnt state any official coding style to follow, so, I just decided to make my own. I am gonna start by making a template code for script or function m-file (class m-file will have to wait since it is quite complex and I havent get a real firm hang on it) and making some GUI function called ‘new’, that will help me or maybe other user with OCD to keep the inconsistency of their coding style by creating template for new m-files. At the same time, I will also write a book (Well, not exactly a book, but more of a note) for general rules in coding style that cannot be included in the template file (such as rules for variable naming and stuff).
  2. Rearranging and renewing MATLAB Fun Toolbox. Again, this still have something to do with my OCD. I took a quick look at several of my codes and see that some of then was horrible and inconsistent with my current coding style (see item no 1). And, some codes are also using specialized toolbox instead of just the general built-in, thus, rendering them useless until you have the said toolbox installed in your MATLAB. So, I decided just to rewrite it and rearrange it slowly one by one. No deadline is chasing me anyway other than my own personal sense of guilt (for playing too much Path of The Exile).
  3. Continuing the MATLAB tutorial. Yup, I haven’t made any announcement about it but somewhere early this year, I created a simple tutorial about making an animation. I decided to make it since I could find any good material in the internet that covers that. Well, probably because noone really use MATLAB for such silly thing like I do. So, I make the tutorial and it turned out to be the one that gave me more traffic. So, I decided that I am gonna make some more to create more traffic. Who knows, maybe I can land a job in Mathworks from this (Yeah, right, I wanna work in Mathworks if I can :D).
  4. Other unclear project that I still have no idea where to start. This include continuing building and sharing X-Plane aircraft that I made (although they have a website for that), a project to create some kind of MATLAB X-Plane mash-up, and a project to create something related to hydropower (which is what I do now). But again, this projects are really unclear and good chances that I wont do them. I’ll just put them here to make this post seems more longer and useful :D.

Well, that’s all for this post. Now time to make it real and do something useful. Well, maybe not now, it is late and I have to sleep cause tomorrow is Monday and Monday means work.

Regards,
0X_R

Posted in Uncategorized | Leave a comment

Reading Your Android Phone Sensor into MATLAB

As a MATLAB fan, I am following MATLAB on facebook to know the latest news about MATLAB or anthing interesting that worth a download in the file exchange center. So ,last week, being a good fan, I was reading MATLAB’s update on facebook then I saw this post about reading accelerometer and gyroscope sensor from your Android phone. Since I’m also a fan of android phone (and now is foolishly struggling to learn some programming in Android), that post sounds very interesting to me. So, I took a good look at the post.

So, in quick summary, the post is about using this SensorUDP program developed by Takashi Sasaki to send the sensor data from your Android phone to a MATLAB session through Local Area Network’s UDP. The guys on mathworks also have created this amazing file exchange that allows you to read the upcoming UDP data that were sent by the SensorUDP program and three example application that reads your sensor into graph. You can download this easily from the file exchange file and play around with it. However, as for me (and maybe most of you too), there is a slight glitch with the file exchange developed by the guys from the Mathworks: It only works on MATLAB R2013a (MALTAB 8.01) and I’m still using MATLAB R2011b. (Sad…)

Fortunately, somewhere in the last year I was working on a project in my university and I happened to learn a little bit about UDP because aat that time, I have to read aircraft’s data from X-Plane into MATLAB through UDP. So, last saturday, I decided to play around with the SensorUDP program and try to read the UDP data directly without using the file exchange file (Well, I can’t use it anyway due to version incompatibility, so, nothing to lose) and it actually worked. Yup, you don’t need that fancy files from the file exchange. As long as you have Instrument Control Toolbox installed in your MATLAB, you are good to go. I don’t know if the support files that the Mathwork guys provide you allows you to read those sensor even though you don’t have Instrument Control Toolbox installed. However, if you are using older version of MATLAB and have Instrument Control Toolbox, you can read your phone sensor directly through a simple UDP connection. Yup, and that’s what I’m trying to show in this post (Finally, so useful post in this very blog :D).

So, here goes the post, How to read your Android Phone Sensor into MATLAB (version older that R2013b) by using Instrument Control Toolbox:

1. Setting Up LAN Connection between your PC and your Phone

Before you start playing with MATLAB on your PC and SensorUDP on you phone, you must make sure that your PC and your phone are in the same LAN network. If you are using your phone to tether Wi-Fi to your computer so that you can browse some internet (which is what I do), then you can’t do this because your phone acts just as a modem and your PC and your phone ended up having same IP address. However, if you do it the other way around (use your PC to tether Wi-Fi), your PC will acts as a LAN server (I think, I’m no expert in networking) and your PC and your phone will have each its own IP address that you can use to establish UDP connection.

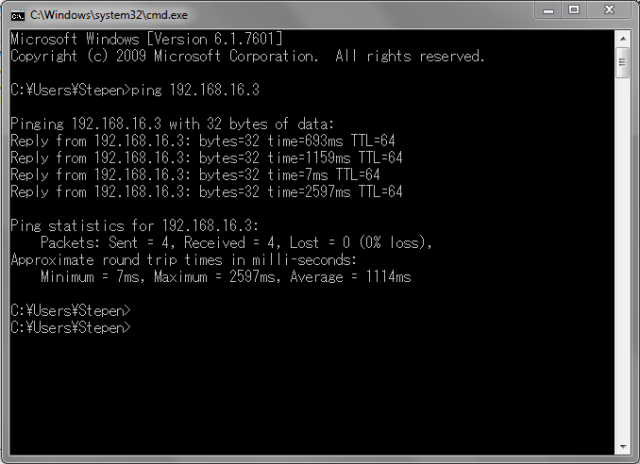
The easiest thing that you can do to check if your PC and your phone is already in the same LAN network is to open command window (Press Win+R, then type cmd) and try to ping the IP address of your phone. The command to ping is as simple as ping <IP address>. If everything is fine, you should see something like below. If it is not, then try to google to solve your LAN problem (I’m sorry, I don’t have many experience with LAN).

Ping

2. Setting Up SensorUDP

After you’ve establish a LAN connection between you PC and you phone, download and install SensorUDP from GooglePlay and run it. Type your PC’s IP address into the host destination box and as for the port number, you can use any port as long as it is now used by other program or reserved by your system. This wikipedia article might give you a little idea about which port number that cannot be used because it is reserved. As for me, I used the default ‘12345’. Whatever you use, remember it because you’ll need this information for your MATLAB session. After you are done with it, just send whatever sensor that you want to sent.

SensorUDP

3. Reading the sensor data in MATLAB

To read the phone sensor (and perhaps any other data sent through UDP connections), first you may need to turn off your Window Firewall or made an exception or else the data won’t get through. After that, you can easily read the phone sensor data but using the following 10 lines of code (22 if you count the useless comments:D). Note that ‘fscanf’ command was used instead of ‘fread’ because SensorUDP sends the sensor data in CSV-formatted string instead of packed data.

%CodeStart--------------------------------------------------------
%Resetting MATLAB environment
  instrreset
  clear
  clc
%Creating UDP object
  UDPComIn=udp('192.168.16.3','LocalPort',12345);
  set(UDPComIn,'DatagramTerminateMode','off')
%Opening UDP communication
  fopen(UDPComIn);
%Reading data
  data=fscanf(UDPComIn);
  disp(data)
%Closing UDP communication
  fclose(UDPComIn);
%Deleting UDP communication
  delete(UDPComIn)
%CodeEnd----------------------------------------------------------

The code above basically just read one single data from your phone once. It is useful to make sure that you set everything right already. If you want to read the data continuously, you can always add an infinite loop like in the following code. Note that this program will make you stuck in infinite loop forever. So, if you need to terminate the program, just fit ctrl+C on MATLAB’s command window.

%CodeStart--------------------------------------------------------
%Resetting MATLAB environment
  instrreset
  clear
  clc
%Creating UDP object
  UDPComIn=udp('192.168.16.3','LocalPort',12345);
  set(UDPComIn,'DatagramTerminateMode','off')
%Opening UDP communication
  fopen(UDPComIn);
%Reading data
  while 1
    data=fscanf(UDPComIn);
    disp(data)
  end
%Closing UDP communication
  fclose(UDPComIn);
%Deleting UDP communication
  delete(UDPComIn)
%CodeEnd----------------------------------------------------------

Note that before you run the code about, you have to make sure that your PC and your phone are connected and the SensorUDP has started sending the data.

4. Processing and visualizing the sensor data

Since the sensor data is sent in CSV formatted string, the variable ‘data’ will contain string data instead of numbers. To read the string and get the actual numbers, I used ‘textscan’ command (may not be the best choice for crunching CSV in real time, but for now, at least it gets the job done). From textscan, you can use the number right away. The following example code reads phone’s orientation and plot it into a bar graph. A cool (or maybe not) video shows how the bar plot changes as I tilt my phone. Note that Takashi Sasaki also uses string as its first value in the CSV line to identify what data that was sent. The second and the third value seems to be related with run time. That’s why the only data that I took from textscan is the fourth, fifth, and sixth value, which is the three axis orientation of the phone.

%CodeStart--------------------------------------------------------
%Resetting MATLAB environment
  instrreset
  clear
  clc
%Creating UDP object
  UDPComIn=udp('192.168.16.3','LocalPort',12345);
  set(UDPComIn,'DatagramTerminateMode','off')
%Creating bar plot for sensor visualization
  sensorbar=bar([0,0,0]);
%Reading sensor data continuously
  longestLag=0;
  while 1
    tic
    fopen(UDPComIn);
    csvdata=fscanf(UDPComIn);
    scandata=textscan(csvdata,'%s %f %f %f %f %f','Delimiter',',');
    data=[scandata{4},scandata{5},scandata{6}];
    if size(data,1)==1
      data(1)=data(1)-180;
      set(sensorbar,'YData',data(1,:))
      axis([0.5,3.5,-180,180])
      pause(0.00001)
    end
  clc
  disp('Data received:')
  disp(data)
  disp('Longest Lag:')
  disp(longestLag)
  fclose(UDPComIn);
  t=toc;
  longestLag=max(t,longestLag);
end
%CodeEnd----------------------------------------------------------

So, to sum this up and to show you how your Android phone’s sensor is really being read into MATLAB, I made this simple video tutorial. It covers up from the first up which is setting up the LAN code and until the very end. It wasn’t the best tutorial because it is self directed, self-voiced (Hell, actually I want this to be voiced by Jon Bailey (If you don’t know, he is the voice of Optimus Prime and most movie trailer narrator)), and self-held. But at least, it gets the job done. I’m also sorry for the smell. I haven’t took a bath for three days when I made that video.

Okay, back to the data reading thing again, one thing that I noticed is that the SensorUDP does not provide an option to change the data transimission frequency/speed (Sure there is Fastest-Game-Normal-UI option, tried all of them and all were still too fast). While in MATLAB you must pause the code execution for awhile in order to give time for MATLAB to update the plot (and probably for everything else that is related with GUI), this causes data stacks. MATLAB pauses its program execution for a while to update the plot while the sensorUDP keeps sending data that ends up on a queue up to be read. When you read another data using ‘fscanf’, it will get the data on the sop of the queue, which is the sensor reading at several miliseconds ago, instead of the newest or current sensor reading. Hence, a snowball effect lag occured. This data will get stacked up and you’ll ended up with data lag even after a few seconds. I managed to get this around by closing and re-opening UDP communication in every loop but I don’t think this is a good practice. However, for now, this gets the job done.

Well, that’s is for this post. I hope this is useful for you guys fellow users of older version of MATLAB.

Regards,

Stepen

Posted in Uncategorized | Tagged , , , , , | 12 Comments

Neo Falcon (Finally, Another RC Heli)

Last friday was a bonus day. It is one of the happy day in a year because in this very day, I got a bonus and by bonus, I meant money(:D). Since this is the first bonus in my entire life, I can’t help but feel happy and rich. It is the only day where seeing my bank book does not make me want to cry (although it will make me cry again in no time). While I’m not gonna spend all of it for sure, I also thought that I should spend some of it and buy myself a little something as a reward for my hard work in Japan in this 8 months.

The very first things on my wish list is Lego Mindstorm NXT. Unfortunately it is quite expensive and I’m still in a huge dilemma, whether I should buy that or not. I did have set up an Amazon account and did everything to buy this toy, but when it comes to the final confirmation page,  just back out and closed the page because I still didn’t have the heart to spend money that much, although I really want that so bad. I just hope that some in the future I will have the courage to click that ‘Place your Order’ button. For now, just let it be in my cart.

That being said, I decided to buy other ‘less expensive’ toy for the bonus, perhaps something that does not make my cry when I see the price tag. And that toy is a RC helicopter. As you know, I have some experience playing with 3 channel RC helicopters (if you guys remember, Ferly and VMax). I know it has been a year since I touched a controller but I think it is a good idea to relive this passion of mine again (the passion of flying a helicopter and crashing it over and over again). So, last saturday, I went to RC section in Yodobashi to pick some bad ass RC helicopter.

KyoshoEgg - SpyMaster

One of The Camera RC Helicopter sold in Yodobashi

In that place, there are several RC helicopter shown on display. Among of them, there were some kick-ass camera RC helicopter and they kinda caught my eye. Well, I think it is quite nice if I can take some aerial pictures rather than just fly the heli around the places. It is quite expensive, but not so expensive that it made my or my wallet cry. But then, I remembered that I couldn’t afford to crash this thing because it has camera attached to it and considering that I haven’t play any in like a year, I will crash this thing for sure. Although the camera may be dismounted (I haven’t checked yet, but I suppose it could), thus allowing me to train and crash the heli without the camera, I thought that it would be safer if I just buy the cheaper camera-less one first and train with it until I get my confidence back. So, I took a look around all the RC helicopter for like about an hour before I finally decided to buy Neo Falcon.

NeoFalcon 01

NeoFalcon and Allie

NeoFalcon 02

NeoFalcon

Neo Falcon is pretty much the same with my previous VMax. It is 3 channel with two main rotor and one tail rotor, with total length around 20cm except that the price is almost twice Vmax’s (Hiks, this is why I hate Japan, everything is more expensive here). It is 4600yen, which is maybe around 500.000 rupiah. However, I did realize that Neo Falcon is made by a Japanese company instead of some random Chinese company, so, I’m also expecting some qualities in this thing. As I set my heart straight, I took Neo Falcon and some rechargeable AA batteries for the controller and went straight to cashier.

So, Sunday the day after, I spent quite some time trying to fly Neo Falcon on my room while keeping the crash count minimum. I did crash it a lot at my first session, but after that, I remembered how to do it and ended up finishing the entire third session without crashing at all (except for when I let go of my right hand because I had to stratch my back and no, it didn’t count as crashing).

About Neo Falcon itself, the first thing I noticed about Neo Falcon is that it can be trimmed easily. It has been awhile since I flied VMax so I can’t compared it for sure, but I do feel trimming Neo Falcon was a lot easier. The trimming did not overshoot much and the trim also didn’t need to be changed much during the flight as the battery power gets weaker causing the main rotor’s rotation ratio to change. When I was flying VMax, I remembered that I had to re-trim quite often due to this loss of battery power, but with Neo Falcon, I just needed to re-trimmed when the battery is almost out. Neo Falcon’s controller also uses slider for trim control instead of button, thus making trimming more comfortable.

On the other hand, while I didn’t exactly timed it, I did feel that Neo Falcon have longer flight time with VMax. However, one thing that I clearly noticed is that while VMax’s performance dropped gradually as its battery depleted, Neo Falcon somehow could retain same performance almost across its flight time. It is only when the battery is almost completely depleted you’ll notice some performance degradation and it was quite a steep degradation. I thought this may be why not much re-trimming is needed during a flight. While each as it’s own advantages and disadvantages (sudden performance degradation may lead to fatal crash), it is easier to have a constant performance over quite long time. That way, I can play around more without wasting flight time for trimming because with my current skill, I can’t fly it around and trim it at the same time. I have to make it stand still while I trim it:D.

Anyway, after the sunday session, I was pretty confident so I decided to play again monday the next day, but this time, with a little crazy/suicidal challenge. I tried to take a picture of Neo Falcon during flight. Yup, that means I have to hover it and keep it controlled with my left hand on the throttle and take a picture with my right hand. It was pretty hard especially when you wanted to zoom in to get better images and I did crash once when I tried this, but the attempt was successful and I managed to take some shots of Neo Falcon in flight. I even managed to take a shot while Neo Falcon does this fly over thingy (Proud!). So, to show off a little bit, here it is, Neo Falcon in action!

NeoFalcon 03

NeoFalcon 04

NeoFalcon 05

NeoFalcon 06

NeoFalcon 07

Honestly, actually I never had this crazy idea before (with Snow Fox, Vmax, or Ferly), but somehow I managed it (I was pretty amazed myself). I might probably do it again and post some more cool pics in the future. Nevertheless, I have to remind you though not to try this at home. At least don’t do this before you perfectly trim your RC, because you won’t be able to yaw it when you are holding the camera.

Well, that’s quite enough post for show off. Now it’s time to hop on to my bed. As a closing remarks, let me show you this overly-blown Hi-Res Neo Falcon under my Allie’s AlienFX. Hope you enjoy this post.

Neo Falcon under AlienFX

Regards,

0X_R

Posted in Uncategorized | Leave a comment

Creative Programming and Processing

During June, I was taking a break from all the online courses on Coursera and was hoping that I would have more time to do my own stuff like the MATLAB Fun Toolbox. However, I wasn’t really that productive even when I wasn’t taking any classes. So, to prevent further laziness, starting last month, I decided to get back on course on Coursera (well, that sounded strange) in hope that I will use my free time productively, although just by doing some homework.

After a quick peek of the course list, I enrolled myself in a course called Creative Programming. Why? Because the course name sold me. I mean, at least for me, it is the first time I heard that phrase. So, out of curiosity, I just said “Creative Programming, Okay, I’m sold!”, clicked my mouse around a little bit and get myself enrolled.

After enrolled, I went to check the course syllabus, information, etc right away and to be honest, after I read it, I was skeptical about the course. Why? Mainly because it is stated that in this course, we will be using a programming language/IDE called Processing. Yup, I didn’t mistype it. It is really called Processing. While I don’t really care about the software’s name, I’m always very selective about installing new software into my Allie (Yeah, that is my laptop’s name and yeah, I named my laptop), especially the one that I’ve never heard of. I have this OCD where I want to keep Allie as virgin as possible (Wait, that didn’t sound right). I don’t want her to be slow because of some useless start up or background service or some cluttered registry. That’s why I really hate installing new software to her unless it is a well-known game (:D) or it is a copy-and-run software like X-Plane where you don’t need to install them, thus, they are not messing around with your system.

So, to fulfill my OCD, I did some background research on this software and it seems okay because it is developed by MIT, have communities and things like that. So, a little convinced by Processing homepage, I downloaded the program. Praise the heaven, it is a typical copy-and-run software, so, without any hesitation, I put it in to Allie (Wait, that didn’t sound right again) and tried it.

Well, first time seeing the IDE, my first reaction was: “Did I downloaded the wrong software?”, because guess what, the IDE is very very similar with, guess what, Arduino’ IDE. Well, actually it is not very very similar, but it is exactly the same, except in Arduino IDE, they have serial monitoring button, while they don’t have it in Processing because it got nothing to do with serial communication. Other than that, it is exactly the same. To make my case, here it is, a side-by-side IDE comparison that I took from diyroboticslab.wordpress.com.

Arduino-Processing Comparison

IDE Comparison – Arduino and Processing (diyroboticslab.wordpress.com)

Arduino-Processing Logo Comparison

Logo Comparison – Arduino and Processing

Guess what, it didn’t stop there. IDE aside, their logos are also basically the same. Well, it is different for sure. Processing use simple P as its logo while Arduino use simple A, but the background, the style, and the play and stop buttons inside the logo. It is mind-blowing. I tried to find out why they are like twins separated at birth for about an hour but I could find a clue. I’m guessing that is because their concept is quite the same, but I’ll talk about that later. Now, let’s get back on track.

Processing is cross-platform programming language which can be run in desktop, Android, and iPhone, but it is not the impressive things about Processing. It is designed in such way that it emphasize on graphical programming and user interaction. So, instead of hello world and some other texts that pop up in command line, the developer can build an graphical application and accommodate user interaction right of the bat. In most programming languages (at least the one that I’ve learned), the developer will got stuck in command line for a little while before he/she can make something that is really have button and picture and stuff and can do something when it is clicked. But not for Processing case. So, without needing to know some weird stuff like callback, event, handler, etc, the developer can make a fully operational program that has something that can be seen/click on the screen.

While I don’t know if it is a good thing or not knowing those weird stuff, things does get easier when you use Processing to make graphical/user interaction based program. At least that’s what I felt when I were using it for the course (which is still going until in the end of this month). You can instantly create any simple shape, insert and animate image, play some sound, and even access mouse movement and mouse click to create an interactive program right away instead of the lame hello world on command line.

A code in Processing is called sketch and its basic structure also consist of two main procedure, the setup procedure that is run first and once and the loop procedure that is ran over and over infinitely, which is (Yup, you guessed right) similar to Arduino’s sketch. It is normal for Arduino to have that kind of structure because it is for microcontroller programming (and usually you want your board to keep doing things for you). However, it is kinda weird for a desktop programming like Processing to have such setup-loop structure, although it is not compulsory to use that kind of structure. Nevertheless, this kind of structure makes it easier to develop an interactive program. I’m not trying to sell this software, but I do think it is innovative and unique. And as a learner, it is more fun because I get to make ‘real’ program right away. Believe me, try the program and do the tutorial, you are going to love it.

One thing that I realize about Processing is that due to its emphasize on interactivity with user and its unique structure, the code (or sketch) become simpler than other and developer does not need to spend most of time on the technical side of programming and can spent more time on some creativity for the program itself, hence, creative programming. At least that’s what I felt when I did my homework. Well, I spent most of my time trying to think what kind of program should I make instead of trying to think how to make this program work (and it is quite hard since I’m not that creative in finding new idea). I ended up recycling my previously made XP line screen saver and some lame version of DoodleJump for my assignment (Click on the link to see the program that I made and uploaded on openprocessing.org). Nevertheless, it was a good experience.

Now, about the course itself, the course is 6 weeks course that started last month and will ended somewhere in this month. For the last three weeks, it was an introductory about playing with images and sound, but this weeks the course went all the way about creating a game (Yay). Overall, it was a pretty interesting learn-by-example kind of lecture and I really recommend this course if you want to get your hands dirty on making mobile apps or some interactive desktop program or a game. If doing homework is too much for you, you can just download Processing and play with the tutorial, it is also pretty good and clear.

And that concludes this post. I’m not associated in anyway to Processing but I do hope you get and try to play with Processing. Now, if you excuse me, I have a game to make:D.

Regards,

0X_R

Posted in Uncategorized | Tagged , , , | Leave a comment

Hold The Line!

Last week, I was putting the Collision Ball library to my MATLAB Fun Toolbox page and than I realized that there are already a quite number of entries that I’ve made and I think the page has became a little bit cluttered. I also realized that the newest entry, unlike the other previous entries, is not a game. So, in order to make it less cluttered, I decided to reorganize the page and classifying the codes into three categories: The turn-based board games, the action-based arcade-like games, and not-a-game entries.

While doing so, I accidentally came across a piece of code that I made roughly one years ago that is also not a game. So, to accompany the Collision Ball library code, I decided to add this code to the my MATLAB Fun Toolbox page.

This code was about creating a line animation that most of you may recognized it as one of Windows XP’s screen saver. I made it somewhere last year as an example/material when I was teaching a friend about creating simple animation in MATLAB. Somewhere along the line, I forgot that I’ve made this code and is has been sitting there in my hard disk doing nothing. I did want to post this code because I’ve already made a video recording of the code in action uploaded in to youtube already, but I don’t know why, somewhere along the line, I just forgot to do so. So, here I am, posting a code that has been sitting in my hard disk doing nothing but taking space. And here it is, the screen capture of my Line Screen Saver.

Since the code was relatively simple, I thought that it will be a good material for an example for my unfinished MATLAB animation tutorial that I do want to finish but I never did. So, I’m going to update the tutorial  somewhere in the near future with this line screensaver as its example material. But don’t get your hopes high because i tend to not keep my promises  that I made for this blog (Hell, look at all the unfinished X-Plane tutorial and the aerospace stuff).

That’s it for today, a quick post just to post a forgotten code. Now, off to my comfortable bed.

Regards,

0X_R

Posted in Uncategorized | Tagged , , | Leave a comment

On My Way to OOP – Collision Ball Class Library

After 6 month of non-stop online course in coursera that made me spending my it-should be-happy-but-it-is-not Sunday for doing the homework and the programming assignment, I decided to take a break and decided to have more fun with my free time. So, last month, I didn’t enroll to any courses after my last courses ended somewhere in the early April. Well, actually, I am currently enrolled in one course but that was just for the course resources. I didn’t watch any of the lectures or do any of the exercises/homeworks/assignments. Last month was leisure month.

During those 6 month, I did learn a lot of things, but what I’ve learnt most from those 6 month is OOP or Object-Oriented Programming, mainly with Java. Since I started my programming career (not sure if I can call that career though:D) with MATLAB and only using it for scientific computing or other silly stuff such as the MATLAB Fun Toolbox, I kinda having a hard time in completing the programming assignments which must be written in Java and of course in OOP style. I do have little experience in C# and Python, but at that time, I was doing what so called maybe-not-perfectly-right-but-what-the-hell-as-long-as-the-job’s-done kinda learning for the C# and Python because I have to meet a deadline (See: Why MATLAB stands for Matrix Laboratory). I kinda know a little, but it wasn’t really helpful.

The good thing is, as the assignment started easy and gets harder a little by little, and it also required the student to utilize the OOP to the fullest. While it is a bad news for a first timer java like me, I now have better understanding of OOP (still suck at it, but I suck less now). Now, at least I now what the hell was public, private, static, and final keywords are for. Last time (when I was programming in C#), I just blindly added and/or changed those keywords until the programs worked as I wanted.

During the month of leisure, an idea/project/things-that-I-want-to-make-but-probably-will-be-left-behind-after-some-point-before-it-is-finished. While this idea thingy won’t be described in this post (I will post again somewhere in the future about this idea), I realized that this idea requires me or at least I thought that it will be easier to be realized if I can implement OOP style programming in MATLAB. Having zero experience of doing such things, I decided to make a simple code about elastic collision in OOP style as practice for future endeavor. This code is about putting several moving balls in a confined space and animating them as they move and collide with each other. I made it in such way that it uses every OOP features as much as possible, such as from static/non-static variables, public/private/protected methods. Long story short, here it is, several simulation results of the collision ball code – OOP style.

While the animation in the videos above looks nice, in order to keep the code simple, this code was made with 2 major faults in it. First,  I used brute force method to find collision between the balls. This means that I have to check a ball’s position relative to other balls and repeat that for all other balls. Thus, for n-ball object, I have to do n! (n! = n factorial = n*(n-1)*(n-2)*… and so on) check. If the number of balls is fairly low, the computer will still be able to keep up the  calculation with the pace of the animation. However, if it is not, the animation will get lagged. Second, I assumed that collision can only occur between two balls, while on the real cases, collision between three or more balls may happen. Thus, when three ball collision occur, it will be calculated as two consecutive two balls collisions. When an interval time between calculation is too short, or when a ball’s speed is quite high, this might cause two balls (the last collision to be resolved) to get stuck with each other because those balls has already overlapped with each other for a significant portion. While I’d love to fix that, it is quite hard to debug this thing, so for a quick fix, I just made a speed threshold to reduce the occurrence of ball stuck (it still happen quite a lot though). I might fix this somewhere in the future, I might not. The purpose of this code was OOP practice in MATLAB, so I can live with those flaw.

Actually, I’m kinda indecisive whether I should put this code on my MATLAB Fun Toolbox or not. For one things, it is not an application like other entry in the toolbox. Instead, it is a class library (You know, OOP style), so, that user must actually type something and do a little programming first before he/she can use it. It is also not a game. But then, it is still fun watching balls colliding and bouncing around (Yeah, my definition of fun is kinda weird), so I’m just gonna put this code there. You can download this code from my MATLAB Fun Toolbox page. The code was poorly documented (I’m too lazy for this stuff), so I also put up some example scripts that are used to create the videos above, so that you know how to use the class library easily through these example scripts.

Well, this post and the code marked my first real product in 2013. It is slow since it is already June, but I hope that I still can meet the resolution that I’ve set earlier this year. Hope the code is useful.

Regards,

Stepen

Posted in Uncategorized | Tagged , , , , | Leave a comment

MATLAB Songs – My First M-File

Last night, I was wandering aimlessly when I found a youtube link shared by Mathwork’s facebook. The link was about a song called my first m-file and it is about creating m-file and dealing with the red text that pops up in the console window (We hate red in our console window). The song is nice and the lyrics also reminded me of my time when I was learning MATLAB and when I was stuck in my thesis debugging my code (as you probably have read on my Thesis log that was posted in this very log). So, I decided to asked the uploader via youtube comment if I can have the MP3 version of the song. Hopefully he/she’ll agree to it.

While waiting for his/her response, I decided to share his/her song here. So, here is the song of my first m-file. Hope you enjoy it.

Regards,

oX_R

Posted in Uncategorized | Tagged , | Leave a comment

Coursera and My Alibi

Wow, it has been two month since my last post. Now it’s March and I’ve finished my language training and just started my life as an ordinary salaryman in Japan by the first of this March. And yup, during these two months, no new code or new tutorial or new anything was added in this blog. Yup, I was unproductive although I have been stating in my resolution for this years that I’m going to be more productive. Well, at least I going a good reason alibi to be unproductive for this blog. So, here it is my alibi:

In order to keep from wasting my free time with movie or 9gag, I decided to take an online course from Coursera. I heard about this site from a friend 2 years ago but never have the chance to try it. Now, that I have quite free time during my language training, I decided to try to take one course in there.

For those of you who do not know what Coursera is, here is its logo.

coursera logo

And here is a brief explanation about it:

Coursera is a web-based learning site where you can take an online course from several respectable university from all over the world. The great thing a bout this website is that it is free of charge and no admission test is required to join course (which is good because there is no way I pass the admission test for these major university). There are a lot of courses on different subject in Coursera, ranging from engineering to art. For every course you take, you must watch a weekly posted video lectures, do some quiz and assignment on weekly basis, and do the final exam at the end of the course. The length of courses is relatively short, it is like around 8 weeks but might be different for each course. While it is free and no admission test , I still don’t know if I will get some kind of distinction or recognition if I pass the course, because up to now, all the courses that I took hasn’t finished yet (Well, one course almost finished, and I’ll let you know how it goes).

After looking at a very long list of courses available to take, at the end of December, I decided to take Game Theory because I thought I could learn something about making video game and so on. However, I was wrong. Although the course revolves around game playing, it is more about decision making and making some strategy. Nevertheless, it turned out to have its own interesting point and I ended up finishing the entire course (I just did my final exam and are waiting for the result now), although at first I think I may quit in the middle of the course.

In the game theory course (or should I say in most courses available in coursera), I  just downloaded and watched several video lectures that are posted weekly and did the exercise and assignment to be done every week. This turned out to be not as time consuming as I think. I just spent around 1 hour a week to watch the lectures and probably around 2 hours to do the exercise and assignment. So, somewhere in early February, I decided to take one more course.

So, once again, I looked at a long list of available courses and finally decided to take Algorithm (part 1) course. This class revolves around programming and I found the course really interesting, because it taught us to be concerned about run-time and memory when doing some programming, hence the algorithm comes into play. In this course, besides weekly exercise, there are also weekly programming exercise in Java. Then I taught this course was good for me because it will force me to learn Java, yet another programming language that I haven’t touched. Unfortunately, the programming assignment turned out to be very hard for me. Maybe it is because of my lack of fundamental in OOP, nonetheless, these programming assignments made me spent quite great deal of time to finish. Thus, become my alibi for my dormancy over the last two months.

Me Before Coursera

Me in My Free Time (Before Coursera)

Me After Coursera

Me in My Free Time (After Coursera)

Fortunately, the game theory class will end on the 10th of this month and I’ve cleared everything that I have to do. So, I will be having some free time and will start being active in this blog (hopefully).

Nevertheless, I think that Coursera is a good place for those of you who have some free time and want to learn something new and I really recommends it. It is free so you got nothing to lose. Even if they does not give any recognition or distinction or something if you pass the course, it shouldn’t be a problem because you got whole new knowledge from it. So, I recommend you to try it.

Well, that’s all that I’m gonna write for this post. After this, I’m gonna have to get back to do the weekly programming assignment (Hiks). Note that although I might seems to be pro Coursera in this post, please keep in mind that I’m not associated with Coursera in anyway. I’m just a member trying to share:D

Regards,

0X_R (not a Coursera Associate)

Posted in Uncategorized | Tagged | Leave a comment

2013 Resolution

It is almost a week in 2013. I took a quick look back at my 2012 resolution and I decided to evaluate myself in terms of my performance for this blog. So, here it is, the evaluation for each point that I made last year:

  • Master C, C#, and/or C++Yup, I was planning to learn at least C# in 2012 because of one projects. While I did learned a little bit about C#, I still haven’t master it yet and there are a lot of this that I haven’t fully understand in terms of OOP (Yeah, OOP is hard, Know I now why information engineering have always has the highest passing grade requirement). I did learned the basic of creating class and its methods and properties and managed to created one, but I still don’t know why did I have to put static or public or anything else. Sometimes the code didn’t work and I just tried putting static and it suddenly worked:D. I still don’t know why. So, for this resolution, I think I must evaluate myself as Failed.
  • Have 5-10 more code in my MATLAB Aerodynamics Toolbox. Yeah, had a plan to expand this toolbox, but it turned out that I haven’t add anything new since last year. So, without doubt, this resolution was: Failed!
  • Have 5 more code in my MATLAB Fun Toolbox. In 2012, by seeing my list of post in this year, I can see that I have posted DoodleJump, Congklak, VirusShooter, Tetris, and Bulls-and-Cows game. It was five games althought the last game (The Bulls-and-Cows) was posted one week before 2012 ended. So, for this resolution,  I can say: Barely Passed! (Fiuh, finally, something that I fulfilled).
  • Have 2 or 3 more files in mathworks file exchange (MATLAB Central). Seeing my profile page in the Mathworks website, I can see that I posted two new code in 2012. It was Congklak and VirusShooter. So, without doubt, for this resolution, I  can say: Barely Passed again! (Yeah!).
  • Finish my unfinished debt for this blog. Well, to be honest, I completely forgot that I still have a lot of unfinished job in this blog. If I wasn’t reading this, I’d probably didn’t remember at all. I have been doing nothing completely for this part. So, this one is: Failed!

Well, two pass out of five. If this was a college, I will get a D and will have to retake the subject again. Thank god it is just a blog. However, I realized that I have to change. I also realized that I posted more programming things than aerospace engineering things in 2012. This made me embaress the ‘All about Aerospace Engineering’ that I put as my blog’s tag line. So, I really need to change things around this blog. And, to do that, here is my resolution for 2013.

  • Focusing only on potential flow, remake the aerodynamic toolbox into library-based instead of individual m-file per function (This is because I’ve learned a little about OOP) and separate the library files and the individual GUI-based m-file on the Aerodynamics Toolbox to make it neater.
  • Create 2 more code for my MATLAB Aerodynamics Toolbox
  • Create 2 more code for my MATLAB Fun Toolbox
  • Post two more code in mahtworks file exchange (MATLAB Central)
  • Finish the unfinished debt for this blog.

Well, I think that’s all the resolution for this year. I’m expecting to be busy because of my work that will start on March, so I hope I’m able to meet those resolutions. Now, if it is not to late, I would like to say Happy New Year! May this year be better than the previous one.

Regards,

0X_R

Posted in Uncategorized | Leave a comment